As a homeowner, you know the importance of keeping your property in top condition, and the same goes for the roads and driveways that connect your home to the outside world. However, over time, these critical paths can deteriorate, leaving them vulnerable to damage and wear. In this beginner’s guide, we will walk you through the steps to effectively repair your road or driveway, ensuring strong and lasting results. If you need road repairs, be sure to visit Claremont Asphalt in Perth for their reliable services.
Understanding the Causes of Road Damage
The first step in any successful road repair project is to understand the causes of road damage. This can include weather conditions, such as rain, snow, or freezing temperatures, as well as heavy traffic loads, and even natural disasters like earthquakes. By identifying the underlying cause of the damage, you can take steps to prevent future damage and ensure long-term durability.
Assessing the Extent of the Damage
After understanding the cause of the damage, it is essential to assess the extent of the damage. This will help you determine the appropriate repair techniques to use, as well as the expected cost and timeline for the project. Some common types of road damage include potholes, cracks, and rutting, and the extent of the damage can vary from minor surface damage to more severe structural damage.
Choosing the Right Repair Technique
Once you have assessed the extent of the damage, the next step is to choose the right repair technique. There are several options to choose from, including crack sealing, pothole patching, and asphalt overlay. Factors to consider when choosing a repair technique include the location and severity of the damage, the expected traffic load, and the climate in your area.
Preparing the Road for Repair
Before you can begin the repair process, it is crucial to prepare the road properly. This will involve removing any debris, vegetation, or other obstructions from the damaged area, as well as cleaning and drying the area to ensure proper adhesion of the repair material. It may also be necessary to prime or seal the area before applying the repair material.
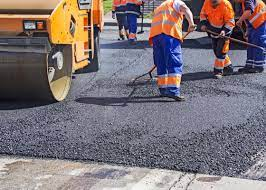
Applying the Repair Material
Once the road has been prepared, it is time to apply the repair material. This will involve filling in cracks, holes, or other damage using the chosen repair technique. It is important to follow the manufacturer’s instructions carefully to ensure a successful outcome. This can include ensuring the repair material is at the correct temperature, applying it in the right quantity, and smoothing out any bumps or irregularities.
Ensuring Long-Term Durability
After the repair has been completed, it is essential to take steps to ensure long-term durability. This will involve regular maintenance, such as sweeping and cleaning, to prevent debris from accumulating on the road. You may also need to apply sealant or other protective coatings to prevent water penetration and freeze-thaw damage. It is also important to monitor the road periodically to check for any signs of new damage or wear.
Conclusion
Repairing damaged roads and driveways is a critical aspect of maintaining safe and reliable transportation networks. By following the steps outlined in this beginner’s guide, you can ensure strong and lasting results that maximize the potential of your road or driveway. Remember to understand the causes of road damage, assess the extent of the damage, choose the right repair technique, prepare the road properly, and take steps to ensure long-term durability.